Showing posts with label Simple. Show all posts

Thursday, February 16, 2012

Crispy Oven Fish

My husband only likes his fish fried and I only like my fish pan fried, so when I found this recipe that was really light and very delicious I had to jump on it.  I have changed it from the original a little and I can't even remember where I found it, but I love it.  My kids just mainly like the fact that there are chips involved. 

When shopping for a good fish for this recipe, I mainly look for a white flesh and I try to find the thickest fillet I can.  This does work great with tilapia, or catfish which are fairly inexpensive, but I like a good piece of swordfish every now and then. 

  • 2 1/2 c crushed potato chips (I use Lays)
  • 1/2 c grated parmesan cheese
  • 2 Tbsp chopped parsley (I sometimes use dried parsley because it's mainly for color)
  • 1/2 c mayonnaise or salad dressing
  • 4 Tbsp lemon juice (3 lemons)
  • 1 lb fish fillets, fresh

1.  Preheat oven to 400 degrees.

2.  Combine chips, cheese and parsley on a plate, or a dish with sides.  Add salt and pepper to taste.  In a small bowl combine mayonnaise, and 2 Tbsp lemon juice. 

3.  Dip fish in remaining 2 Tbsp lemon juice, then mayonnaise mixture, then cover in chip mixture. 

4.  Arrange fish in oiled baking dish.  Bake in the oven for 5-10 minutes or until fish flakes with a fork.  *The fatter the fillet, the longer the cooking time will be.  Serve with a green vegetable and some fluffy rice...YUM!  ENJOY!!

Friday, February 10, 2012

Easy Chicken and Pasta Dinner

This is one of my all time favorite recipes.  I pretty much lived on this in college because it was so easy and quick.  I still make this as a quick lunch or even dinner for the kids with some roasted broccoli.  I have even substituted broccoli for the pasta if I didn't want to eat any carbs that day.  YUM!!


  • 2 Tbsp butter
  • 1/2 Tbsp ground cumin
  • 1/2 Tbsp lemon pepper
  • 2 chicken breasts, boneless (you can also use a white fish, pork, or chicken tenders)
  • 4 oz. spiral pasta, cooked (I like the multi-colored ones, but any short pasta here would work)

1.  Melt about half the butter in a medium skillet.  Season the chicken with the cumin and lemon pepper.  When the butter gets hot, add the chicken to the pan and cook through, flipping once.  This should take about 5 minutes per side. 

*Remember to make sure the finished temperature is above 165 degrees.

2.  Remove the chicken from the pan and let it rest on a plate.  Melt the remaining butter in the same pan and add any remaining cumin and lemon pepper you might have.  Toss the pasta into the butter mixture and cook until hot and even a little brown on the edges.  (This gives your pasta a little texture.)  This should take 4-5 minutes. 

3.  Serve along side the chicken and add a green vegetable for a full meal.  ENJOY!!

Thursday, February 9, 2012

Tuna Steaks with White Bean Salad

I need to post a few without pictures to get back in the swing of things.  I have, over the years, written down some of my favorite recipes in a journal.  I normally use recipes for my cooking, but I tend to make notes and change things according to my family's likes and dislikes.  Over the next week I am going to just throw some of these recipes up so you guys can see.  Sorry about not having any pictures right now.  I tend to forget to take them about half way through cooking.

  • 3 Tbs. lemon juice
  • 3Tbs. Olive oil
  • 3 Tbs. minced scallions
  • 1 Tbs. chopped sage (if using dried here double it)
  • 2-15 1/2 oz. cans cannellini beans, drained
  • 4-5 oz. tuna steaks
1. Whisk together lemon juice and olive oil in a medium-size bowl; add scallions, sage, 1/4 tsp kosher salt, and 1/4 tsp black pepper.  Combine 3 Tbs of this mixture with beans.  Reserve remaining mixture for later.

2.  Season tuna steaks with salt and pepper.  Heat 2 Tbs olive oil in a large heavy-bottomed skillet.  Sear the tuna steaks on each side about 2 min each for medium rare, or leave on longer for desired degree of doneness.

3.  Place bean salad on serving plate, top with tuna steaks, and drizzle with reserved lemon mixture.  ENJOY!!

*Also great served over white rice*

Tuesday, January 17, 2012

BLT Cobb Salad

I'm back!!  I went on a little hiatus over the holiday mainly because with the kids all being home I didn't have a lot of time to write.  Plus, with the busy schedules comes eating out a lot and not so much cooking.  I have decided to start off easy this first post with a salad.  I know some of you may not think of salad as a main dish, but if it's served at our house, it usually is.  This is my husband's favorite salad and I can get the kids to eat most of it, so it's a real winner. 

A few things first...  Normally, and in this case, a salad is about cutting things up and throwing them on top of lettuce.  This salad does, however, have one ingredient that, for some people, is a little difficult.  So, I want to show you how I tackle it:

The one ingredient I am referring to is the avocado.  There are a lot of tools out there now for this little green fruit, but I like to stick with the basics...a knife and a spoon.  First, you take the avocado and turn it upright where the smaller end is pointing up.  Then take your knife and slice the avocado in half turning it all the way around the seed. 


Now, take the knife out and hold the avocado like you would a football with the cut part in between your thumbs and twist in opposite directions.  This should release one side of your avocado from the seed so you will now have two pieces. 

Next, it's time to take out the seed.  This can be very dangerous, so please be careful.  I like to hold the avocado half in a folded up towel, so if my knife should slip it hits that first and not me. 

Now, hold the avocado, seed up, in the hand you are not using the knife with.  Take the knife and press down with gentle force to cut slightly into the seed.  Then, give it a little twist and it should slide right out.  The more ripe your avocado, the simpler this should be, so if you are nervous, don't buy a hard avocado.  Also, if you don't want to try this use one of those tools I told you about. 


Lastly, still holding that avocado, take your knife and make a criss-cross pattern into the fruit.  Then, take that spoon I was talking about and scoop out the meat of the avocado.  Finished! 


Let's get on to the recipe:

  • 2 1/2-3 c lettuce (this can be heads of lettuce cut up, or the bagged stuff)
  • 2 Tbsp. balsamic vinegar
  • 1/4 c crumbed blue cheese
  • 2 tomatoes, chopped
  • 1 cucumber, chopped
  • 1/2 package bacon, cooked and crumbled
  • 1 bunch scallions, sliced thin
  • 1/2 c shredded chicken
  • 1/2 c frozen corn kernels, defrosted
  • 1 avocado, chopped

1.  Lay out the lettuce on a serving plate, or in a big salad bowl.  Pour the balsamic over the lettuce and mix it all together. 


2.  With each ingredient, lay them carefully side by side on top of the lettuce. 


3.  Serve just like this with any salad dressing of your choice.  In my house, we like to use Ranch.  ENJOY!!

Monday, December 5, 2011

Stuffed Peppers

In my house we do stuffed peppers a lot.  They require a little bit of prep work, but they are hearty comfort food that still can be healthy.  I like to serve these gems with a light salad, or maybe some crusty bread in front of a good movie (cartoon, of course).  The kids even enjoy these because cooking the pepper a little brings down the sharp flavor.  So, let's get cooking:


Ingredients:
  • 4 bell peppers (any color can be used)
  • 1 lb. ground beef (turkey or pork can also be used)
  • 1 medium onion, chopped
  • 1-14.5 oz can chopped tomatoes (not drained)
  • 4 oz frozen corn
  • 1 c cooked white rice
  • 2 c mozzarella cheese, separated
  • kosher salt and pepper

1.  Preheat the oven to 350 degrees.  First, let's take on the bell peppers.  What you want to do is cut the top off (just enough to take off the stem and create an open cavity).  Then, reach into the pepper and pull out all the seeds and as much of the veins as you can.  If you need to use a small knife to get more out just be careful not to cut yourself.  Now, in a small Pyrex dish arrange the peppers so they stand up straight.  You may have to shave a little off the bottom if one is uneven.  When I go to buy the peppers at the store I look for something that is pretty stable on it's own. 


2.  To make the filling, brown the meat in a hot skillet.  Add the chopped onion and saute about 3 minutes until soft.  Add the canned tomatoes and corn and simmer all together about 15 minutes.  The mixture will thicken a little, but don't let it get too dry.

You want to use "no salt"
so you are in control of how much salt is
in the finished product.


3.  Add the rice to the mixture and one cup of the cheese.  Season the filling with kosher salt and pepper to taste.  Then, with a large spoon, fill each bell pepper with as much of the mixture as you can stuff in there.  Top each pepper with a mound of the leftover cheese.  You should use about 1/4 cup for each pepper.  Add a small amount, about 1/4 cup of water to the bottom of the Pyrex dish.  Bake, uncovered, in the oven for 30 min, or until nice and browned on top.  ENJOY!!


Side Note:  This meal can easily be made vegetarian by omitting the meat and adding more vegetables like maybe some spinach, or even eggplant.  

Thursday, November 24, 2011

Apple Pie

I have never been much of a baker before.  I have always stuck to savory cooking mainly because I am lazy with the measuring.  Well, I have found a recipe for Apple Pie that is really easy to make and remember.  Remind me to never make three in one day again, though.  One might think that cooking in bulk would not be that much harder, but it was!

Let me start this off by saying I do not make my own crust.  I fear that doing this would really mess up my easy dish.  There are good products out there to use instead.  If you like to make your own crust, by all means, go ahead.  I will try to tackle that later.  Also, about the apples.  I have heard that Grammy Smith are the only apples good enough for pie.  I agree...almost.  I use half Granny Smith and half Golden Delicious.  The green apples stand up to cooking much better then the red ones, but I like the two textures and the way the red apples melt in your mouth.  Now that we have those two points out of the way, let's make some pie!

Ingredients:
  • 2 ready-to-bake pie crusts for 9 in pies
  • 8 small-medium apples (4 green, 4 red)
  • 1 lemon, juiced
  • 1 c white sugar
  • 1 Tbsp flour
  • 2 Tbsp cinnamon
  • 1 tsp nutmeg
  • pinch kosher salt
  • cinnamon sugar mixture (for serving)
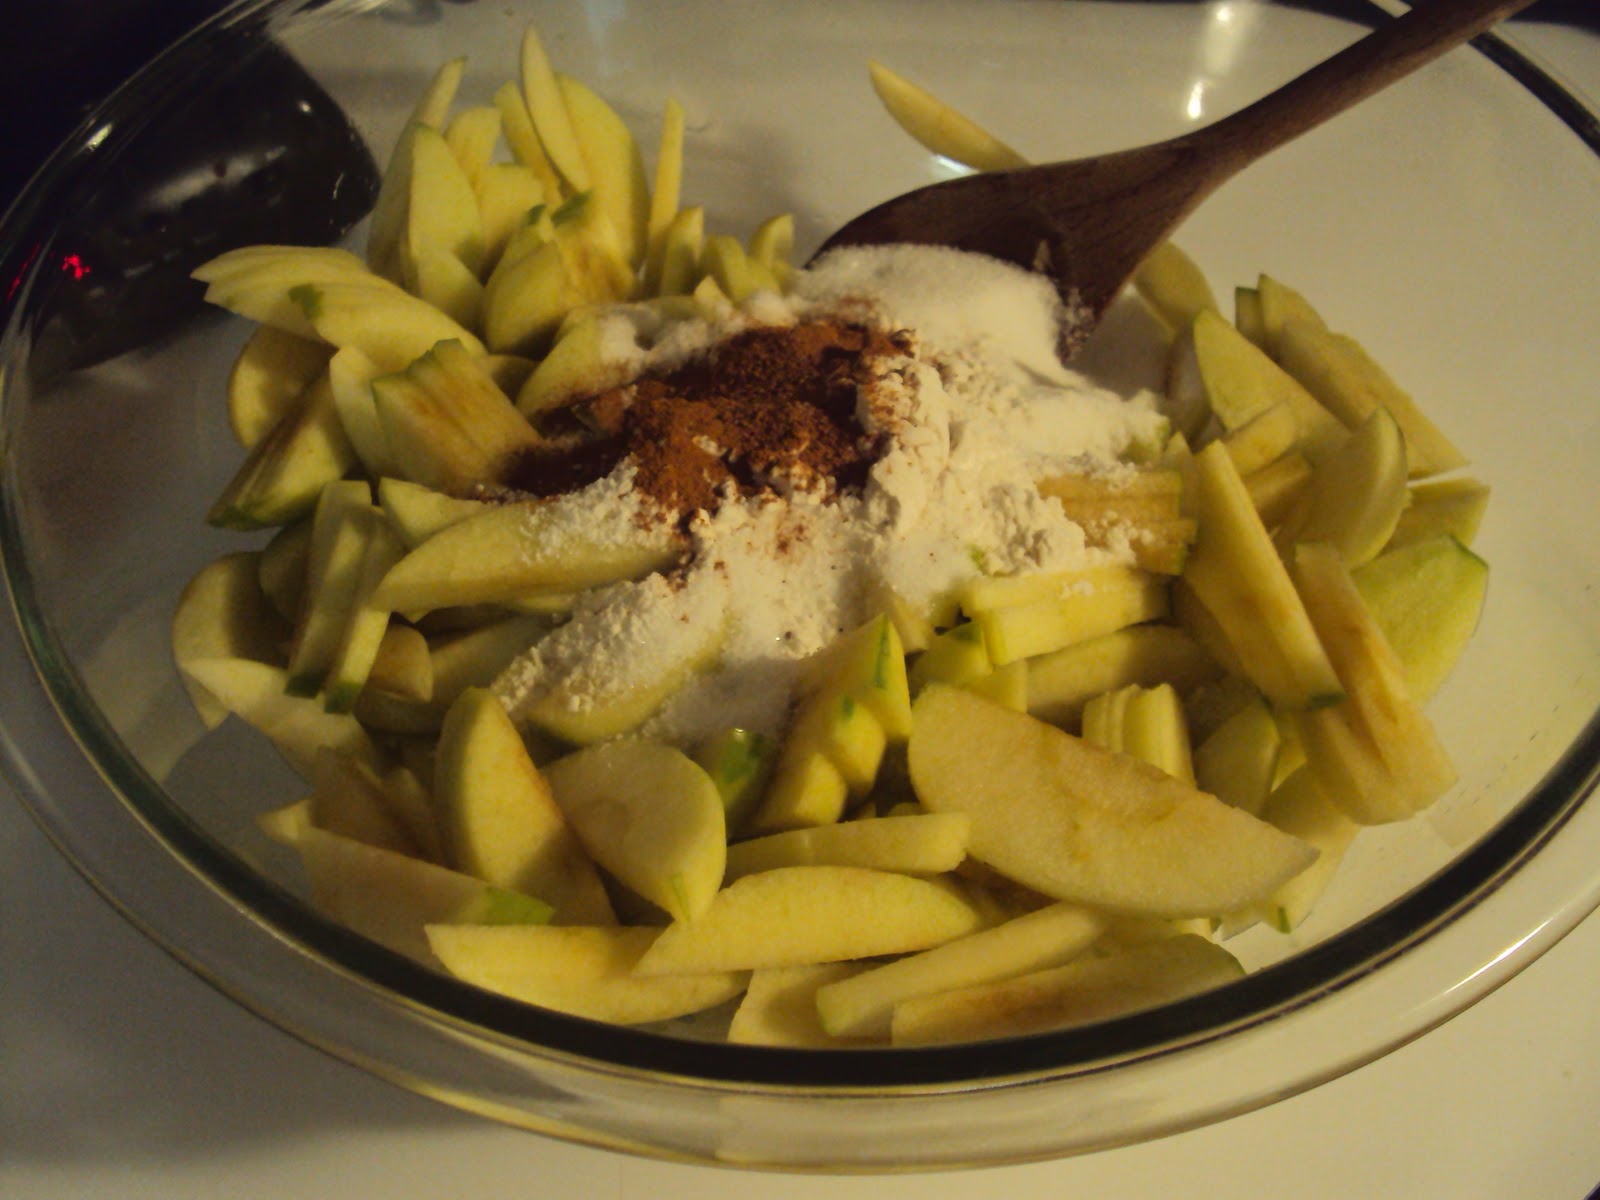
1.  Preheat your oven to 425 degrees.  Take pie crusts out of the fridge and let them sit in a semi-warm place while you prepare the filling.  Peel the apples and cut around the core (like the bell peppers) to get all the meat off.  Slice the apple into small slices and toss in a large bowl.  Add the lemon juice, sugar, flour, cinnamon, nutmeg, and salt to the bowl and stir together.  (I like to let the mixture sit while I make the crust.)


2.  Remove one crust from the packaging and unfold it onto the counter.  If there are any tares in the dough just press them back together.  Lay this bottom crust into the pie pan and press, carefully, into the bottom corners.  If the dough ripples on any of the sides of the dish just press flat.  Pour the apple mixture into the dish and get working on the lattice top.


3.  The lattice top is hard to explain, easy to do, but hard to explain.  There is a diagram below.  Basically, you take out the other pie crust and roll it onto a flat surface (counter).  Take a ruler, or I us the side of the box, and cut strips about 3/4 in thick.  Remove every other one and lay them starting with the smallest across the pie.  Now, unroll every other strip and lay another strip parallel to the previous strips.  Make sure the strip you choose to lay down reaches the length of the pie.  Lay the strips that you rolled up back down and roll up the other strips that were down before.  Lay another parallel strip and cover back up.  Repeat this until the whole pie is covered.  If you choose another topping feel free to ignore this past paragraph.

I made one on the counter so it might be easier to see.


Pillsbury.com
4.  Now to make the edges.  I cut off all the excess dough that has formed around the pie.  Just take a pair of clean scissors and cut everything that is hanging over the edge.  Take your fingers in your right hand and make an almost touching "V".  Place your left index finger in between and push.  This is how you will form the edges.  Just take a small amount of the edge, lift it off the lip of the dish and press in between your fingers.  It should look like this:

Not my picture, but I can't do that and
 take the pic at the same time!
5.  Place the pie on a sheet pan in the oven and bake, uncovered, for 15 minutes.  Take the pie out and cover the edges with strips of foil.  Put the pie back in the oven and continue baking for additional 15 minutes.  Pull the pie out and let it rest for 2 hours.  ENJOY!!

Wednesday, November 23, 2011

Fish Tacos

I know, I know, I have been slacking big time!  I am going to try to give you three recipes in one day.  If I only get to two please don't stone me.  When the kids get up from their nap I have to go. 

My first recipe is for Fish Tacos.  At my house we eat Tex-Mex at least once a week!  We try to do Taco Tuesday (We eat tacos in our jamas in front of a movie) every week, but I often get bored with the same beef tacos over and over again.  So, sometimes it is Enchilada Tuesday, or Fajita Tuesday, but I always keep it close to the theme.  This recipe is very simple...almost too simple to blog, but I wanted to get it out there anyway.  I find that you really can use any type of fish you like as long it is white and flaky.  Meatier fish like salmon and tuna will have a different mouth feel and flavor.  Also, this meal is pretty inexpensive if you stay along the lines of tilapia or even catfish.  Let's get started...

Ingredients:
  • 1 1/2 lbs. boneless, skinless white fish (I used tilapia)
  • 1 Tbsp Cajun seasoning
  • 2 Tbsp olive oil
  • 8 corn tortillas
  • 1 c. shredded cabbage
  • 1/2 c. chopped tomatoes
  • 1 lime (in wedges)
  • handful cilantro
  • 2 green onions (sliced thin)
  • 4 oz. sour cream
  • 4 oz. cilantro ranch (recipe follows)
1.  Pat the fish dry with a paper towel.  Season with the Cajun seasoning.  In a hot skillet over the stove add the olive oil and cook the fish until opaque all the way through (about 3 min per side).  Remove the fish from the pan and let it rest on a plate in a warm spot. 

Assorted Toppings


2.  While cooking the fish, wrap the tortillas in foil and let them sit in a 200 degree oven to get warm.  When the fish is finished separate it among each tortilla and use any combination of the toppings you would like.  ENJOY!!

YUMMM!!!
Cilantro Ranch:
  • 3 oz. ranch
  • handful cilantro
  • 1/2 lime (juiced)
  • Kosher salt and pepper
1.  In a food processor, or blender combine all ingredients.  Cover the mixture with lid and turn it on!  Blend until nice and smooth.  If there is not enough liquid to make it a sauce you can add a little more lime, or even some water.  (Just enough to loosen it up.)  Taste mixture often to help with the seasonings.  ENJOY!!

Tuesday, October 25, 2011

Meatloaf

I know a lot of people have this misconception that meatloaf is not good and that "mommy" forced you to eat it when you were little along with nasty Brussels sprouts and gross spinach.  Well, while a lot of people still don't like Brussels sprouts, spinach and meatloaf have come a long way.  This recipe has been used in my family since I can remember and there have never been leftovers!  This will be really simple to make and will be a new favorite in your house.  (The ketchup helps the kids to love it.)

I have been slacking with taking pictures, so I don't have any today.  As I thought more about it, though, you might not need to see any since this is so easy and quick.

Ingredients
  • 1 lb. ground beef (ground round is best because you want a little bit of fat...not too much)
  • 1 small onion (chopped)
  • 1 egg
  • 4 oz. saltine crackers (one package from the box, crushed)
  • 8 oz. tomato sauce (small can)
  • kosher salt and pepper
  • ketchup
1.  Preheat the oven to 350 degrees.  Using a large bowl, mix the first five ingredients together with your hands.  Go ahead and get messy, but remember to either have the water running, or a paper towel close to clean yourself off. 

2.  Season the mixture heavily with salt and pepper.  (I would suggest about 1 tsp. of each.) 

3.  Press the meat mixture into a loaf pan.  Keeping the dish uncovered, put it into the oven and bake for 1 hour.

4.  When the meatloaf is done, check the temp with a thermometer.  You want to see at least 165 degrees.  (It will probably be higher.)  Let the meatloaf rest for 15 min. 

5.  Now, I use a metal spatula to remove my portion from the pan.  It probably will not be a solid piece, but it will taste much better then your typical dense meatloaf.  Top each slice with a generous serving of ketchup.  ENJOY!!

P.S.-  I have made this recipe with ground turkey, but remember not to use the leanest meat at the grocery store or your meatloaf will be dry.